Epson wireless projector in More 110 and More 218 requires some software for your laptop, smartphone or tablet. Supported operating systems are Windows, Mac OS, iOS and Android. Although the instructions below pertain to Windows, they are directly applicable to Mac OS and can provide guidance to users with iOS or Android mobile devices running "Epson iProjection" App.
Step 1: Download and install the software
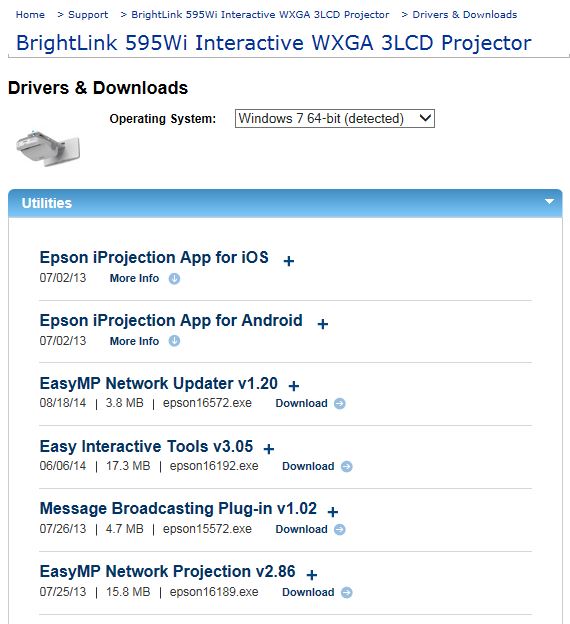
The first step is to download the driver for your particular computer type, be it Windows or Mac. Click on this link for the Epson drivers and select Drivers & Downloads.
Make sure that the "Operating System" detected automatically matches your OS. Then expand the "Utilities" menu (see image below).
Click on the EasyMP Network Projection download link. Double click the downloaded setup file and proceed with the software's installation; it should not have any 'options' to select at this point, and installation should be fairly straightforward.
You may also wish to download and install the Easy Interactive Tools for the on-screen annotation tools.
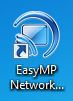
Find the program for EasyMP Network Projection under Programs and select it. If you foresee routine use of it, create a desktop shortcut for ease of access:
Step 2: First time use and software configuration
Please be in front of the projector for these next steps!
Turn the projector on by pressing the power button on the projector or the remote control once.
Make sure your laptop is connected to University of Washington WiFi network.
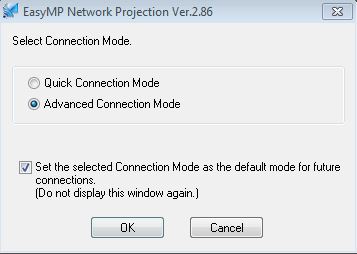
On your laptop, start the EasyMP Network Projector program. Upon first use, you will be asked if you wish to do Quick or Advanced connection mode. Select Advanced and check the box for setting this as the default action:
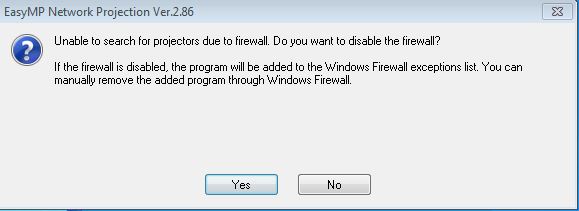
The program will request that you 'disable' the firewall. This is poor language use by the program; it will simply add an exception for the program in the firewall settings. Click 'yes' to the dialogue box below:
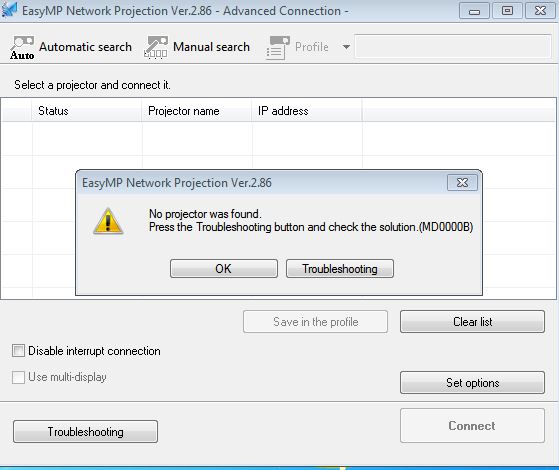
Next it will try to automatically search for a projector and will fail. This is entirely normal! Simply click 'OK' at this step.
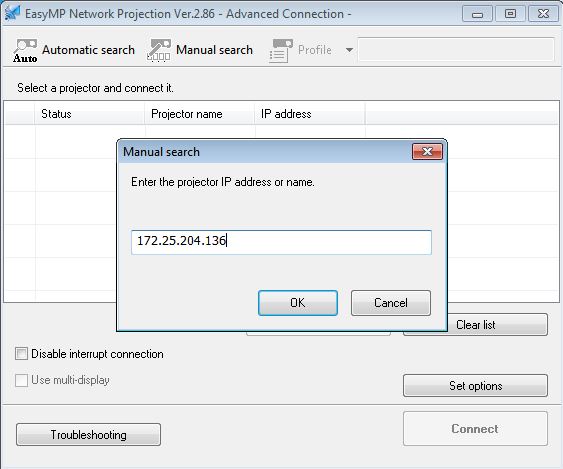
Next we find the projector by clicking 'Manual search', using the top middle button shown in the image above. In the next box, enter the IP address that is projected on the screen of the projector. For example, The projector in More 110 has the IP address 172.25.204.136:
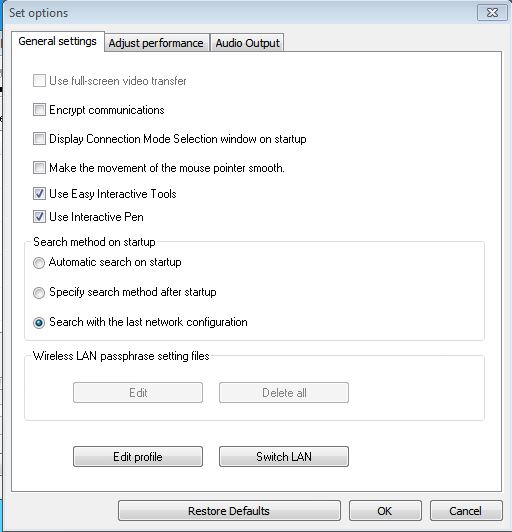
Once the projector is found, save the configuration by clicking on the "Save the connection profile" button. You can also select "Set options" and click on the radio button named "Search with the last network configuration" on the Search Method on startup section of the Options window as follows:
This will allow you to launch the EasyMP Network Projection program and quickly connect to the projector in the future.
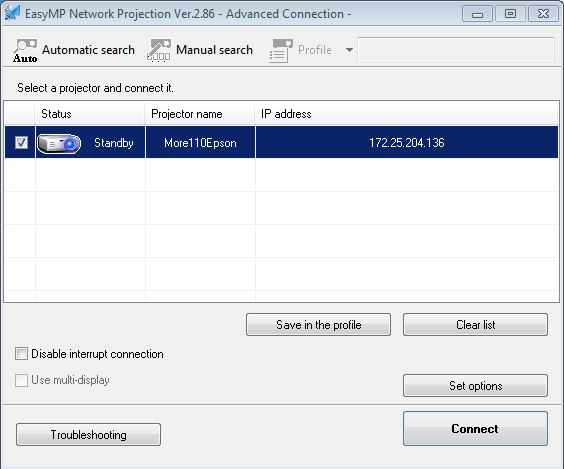
Lastly, click on the "Connect" button to establish a connection.
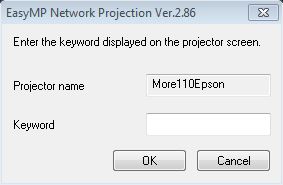
This will ask you to enter a 4 digit numerical code in the Keyword field which is shown on the projector screen itself.
Once entered, the connection should be established and you should now be projecting your computer's screen onto the projector.
On the bottom right of your screen you should see the connection tools, including the 'disconnect' button to press once your presentation is done:

Step 3: Subsequent use
The next time you have use of the projector, you will only have to launch the EasyMP Network Projection program. It should present you with the last used configuration screen, much like this:
From this screen, simply click on the "Connect" button and enter the 4 digit code in the Keyword box.